A few months ago we wrote about what Shopify is and how it works. Well, today I’m going to show you how to send SMS in Shopify through Integromat and Instasent.
But first of all, what is Integromat?
What is Integromat and how is it integrated with Shopify?
Integromat is the online tool that takes care of automating the tasks that we usually do manually, connecting apps, services and intelligent devices to liven up our work.
Sounds good, right?
And how does it work?
Our task in this tool will be to create the workflows that best suit us and that interest us the most, so that Integromat can execute them automatically.
In the case of workflows, we have two options. First, there are predetermined flows available within the tool itself that we can use. This is a convenient benefit because we won't even have to configure the flow ourselves manually. For example, there are integrations like "Save new Gmail attachments to Google Drive", "Automatically forward new Gmail emails containing a specific word to another email", or "Add or update Google Sheets rows from new Google contacts”. The second option is that you can also create workflows manually through a simple interface.
This Integromat integration is a success story for our client, Beeping, a private fulfillment company for e-commerce, which uses the Instasent service together with Integromat for multiple SMS sending automations.
How can we integrate it with Shopify?
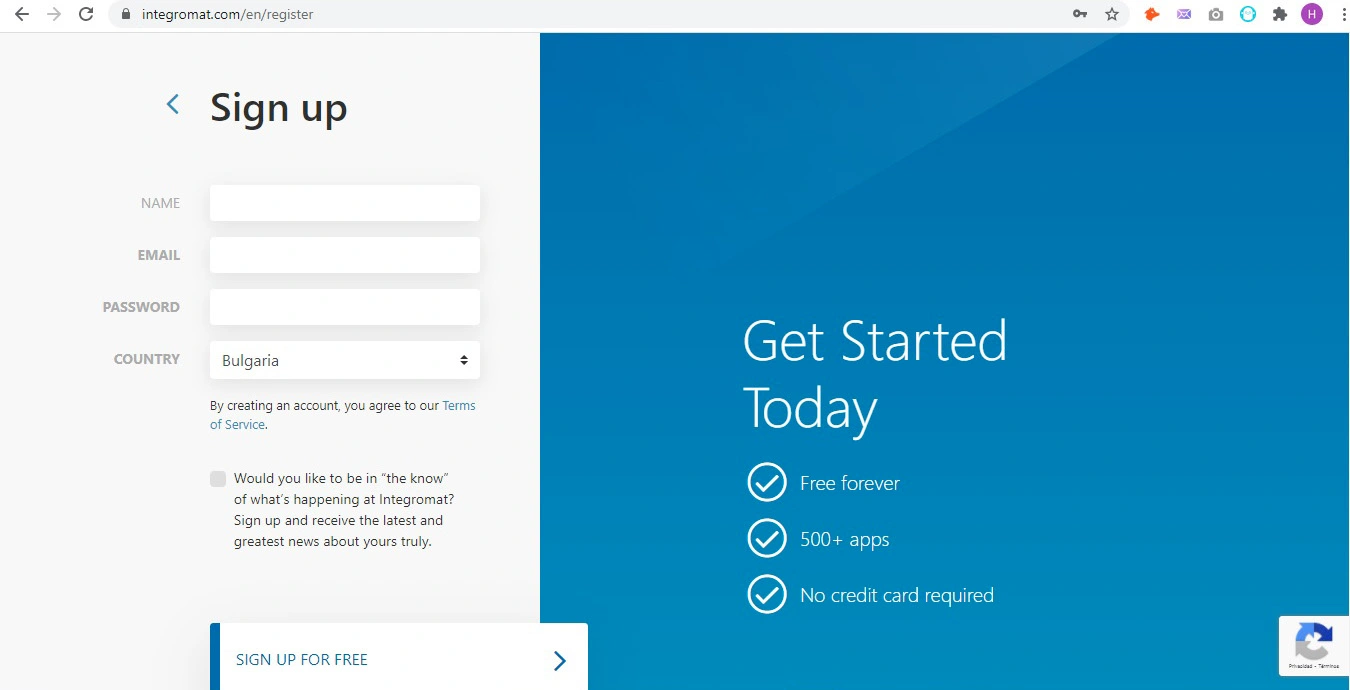
Let's see it step by step. First of all, we register with Integromat.
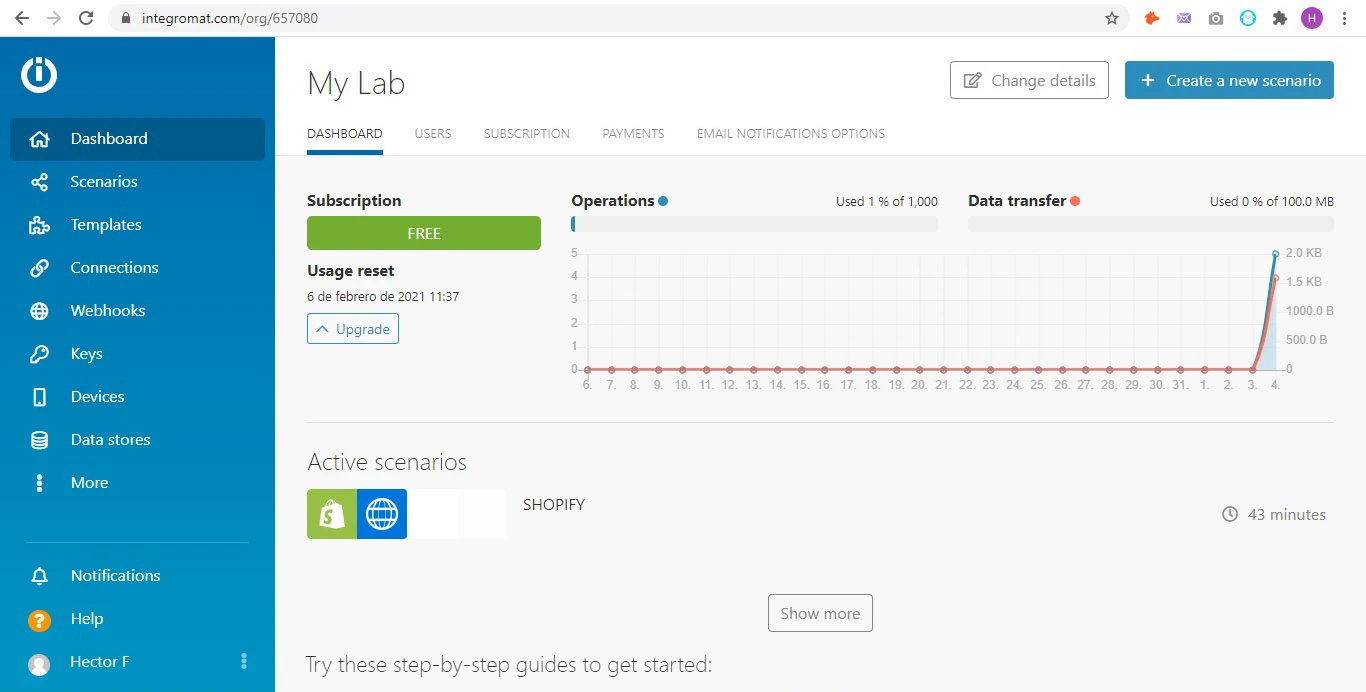
From Integromat, we must Create a new scenario (the blue button, top right).
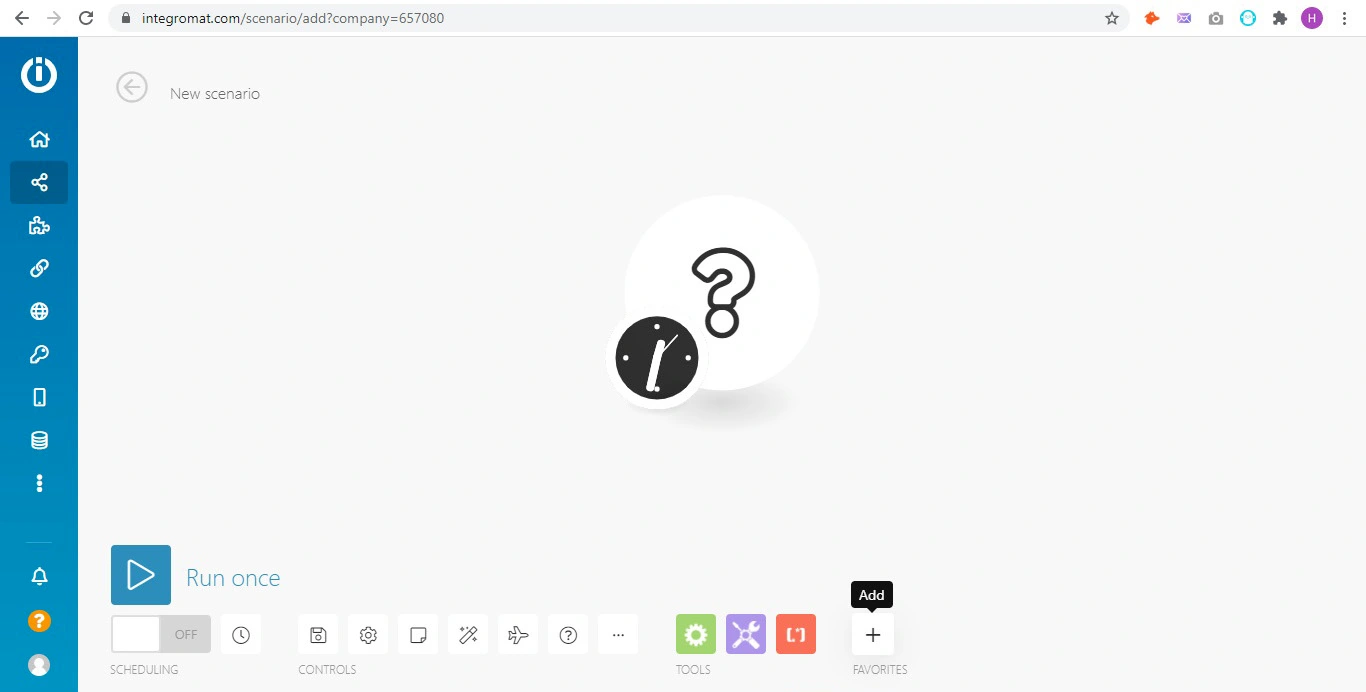
We continue without adding any app.
We will see the following menu in which we must press ''+ Add'' to add Shopify and HTTP; in this case we start with Shopify.
We add what information we want to obtain from Shopify; in this example we can see the Abandoned carts option.
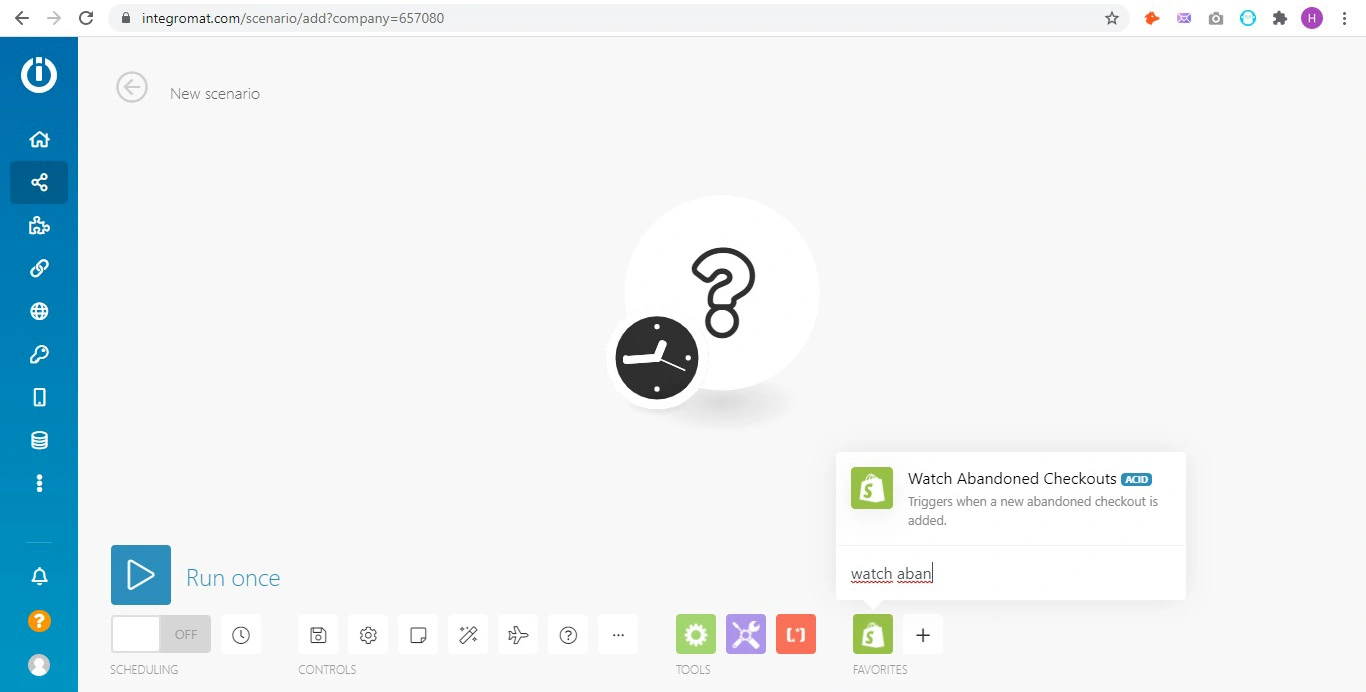
We chose Watch abandoned checkouts. We have chosen the action of abandoned carts recovery because it is one of the most demanded in digital marketing, especially on platforms like Shopify. But many other actions can also be automated, such as:
- Send an email and SMS for every abandoned payment in Shopify
- Send a purchase confirmation SMS
- Send a thank you message to a new customer in Shopify
We choose the one we want and connect Shopify if we don't have it yet, using the blue button.
We put the name that we want to call the connection and the subdomain of your online store.
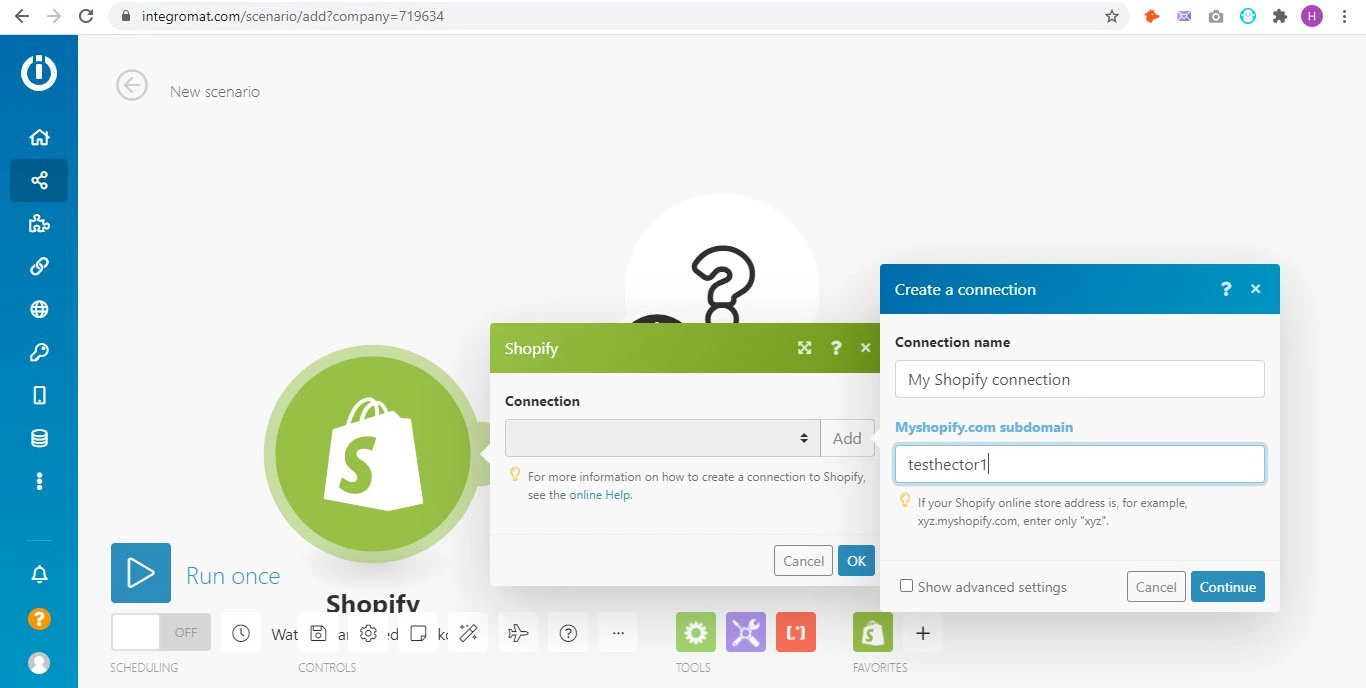
If your store is called testhector1.myshopify.com the subdomain would be testhector1.
You must grant permission if you do not have it; for this you click on the Advanced Settings button and access your online store through the URL below.
Accept and install it.
Great! You have already connected Shopify to Integromat!
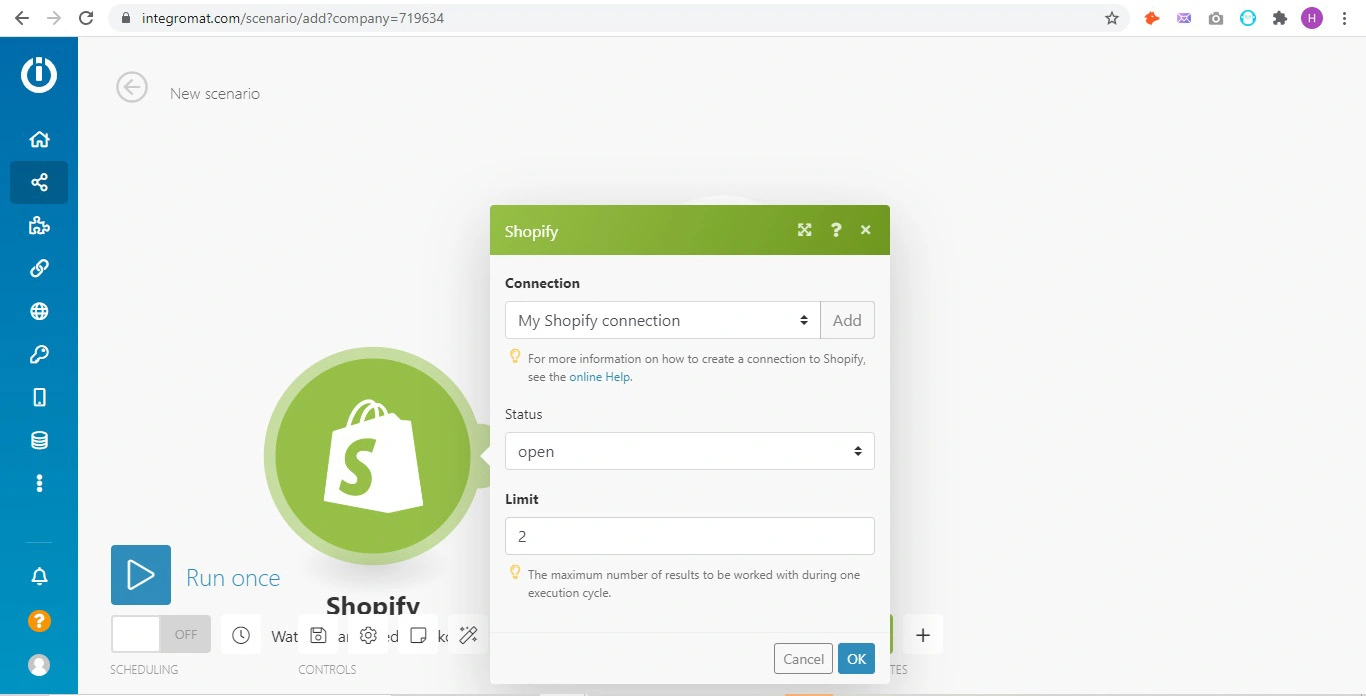
Change the status to "open" and press OK.
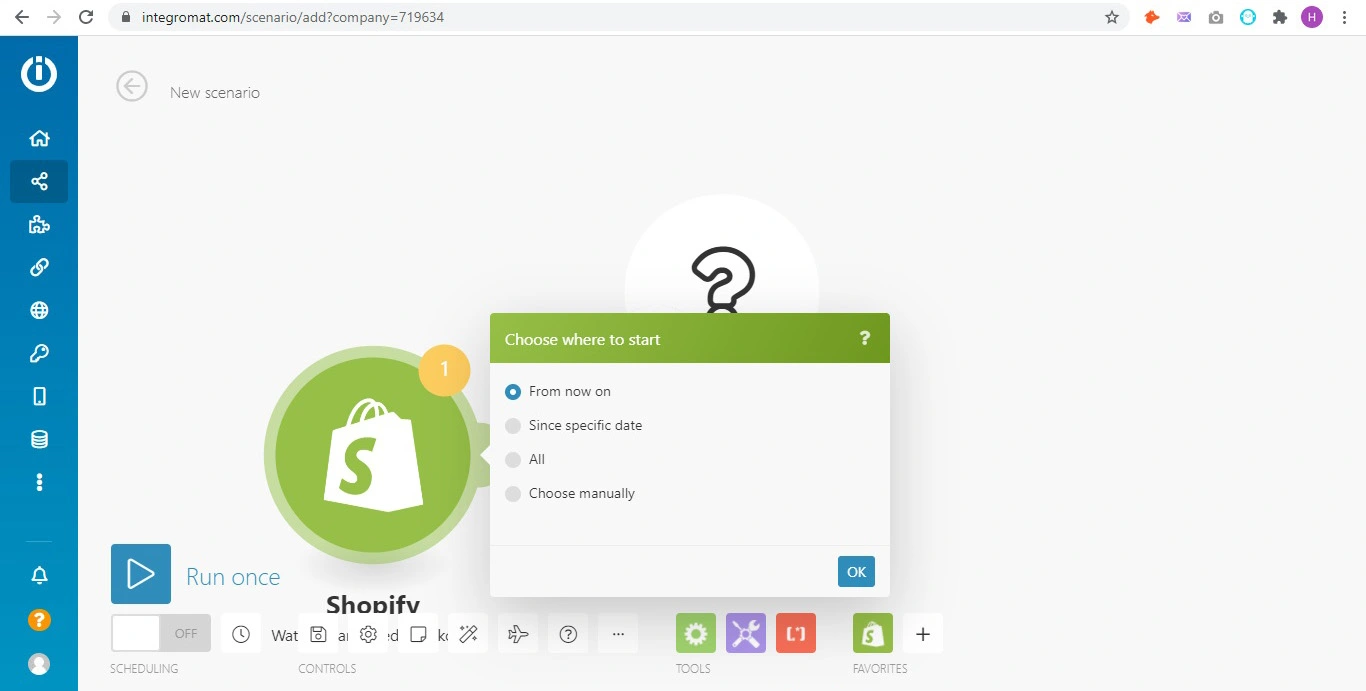
Choose From now on to detect abandoned carts from now on.
How to configure Integromat for sending SMS?
In the steps below, we will see how to configure Integromat to connect directly with Instasent and make it easier and faster for us to send SMS according to the required action.
From the last scenario that we just looked at, we must click on "+ ADD" and add HTTP.
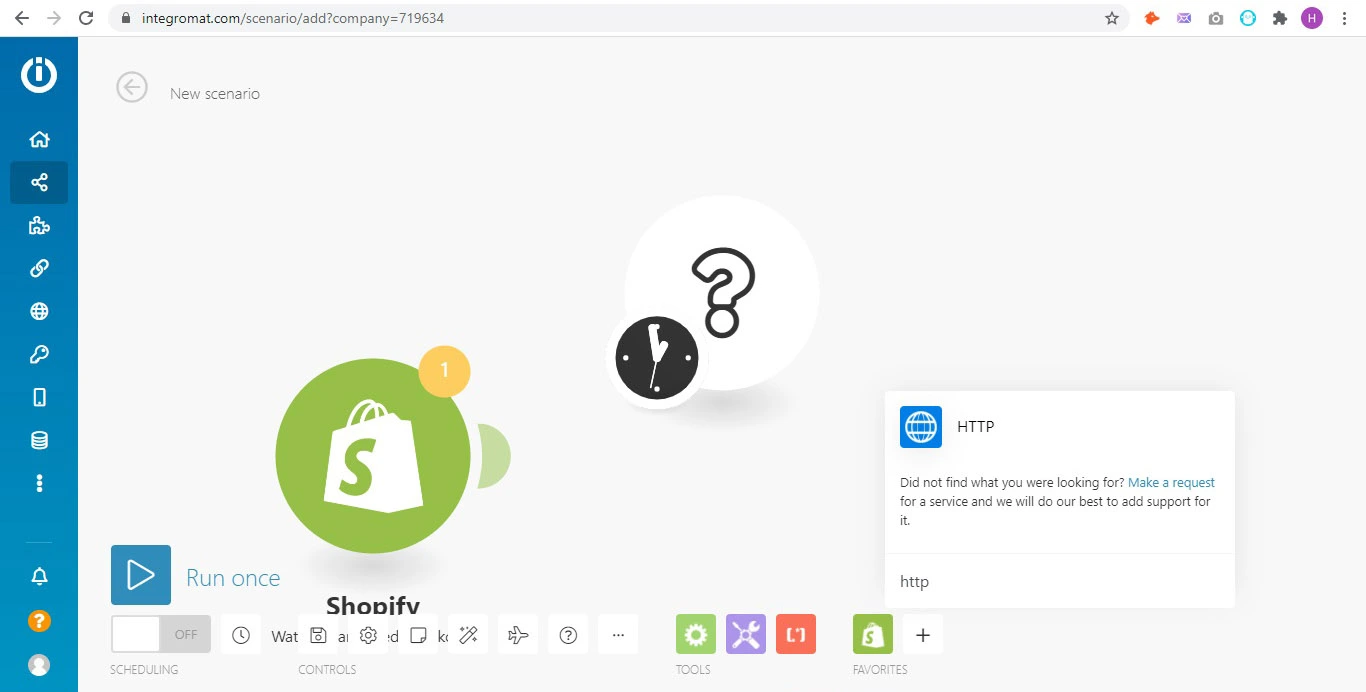
Choose the first option, Make a request.
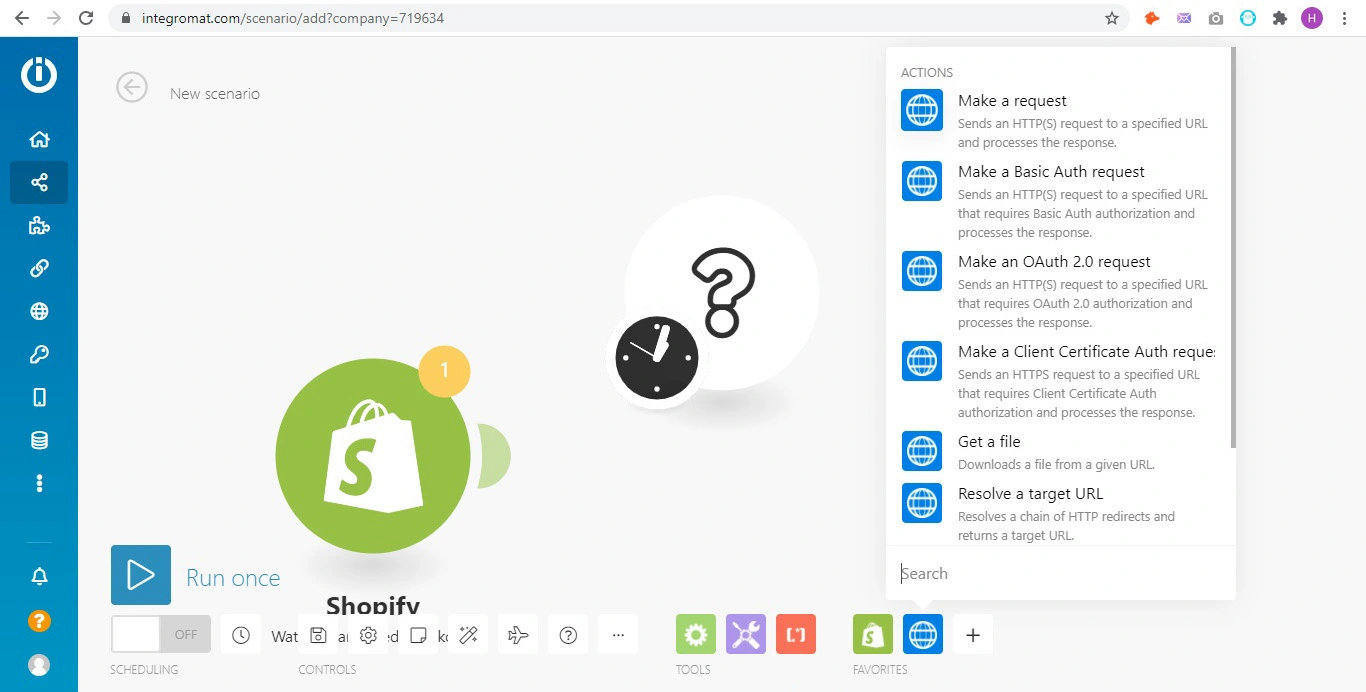
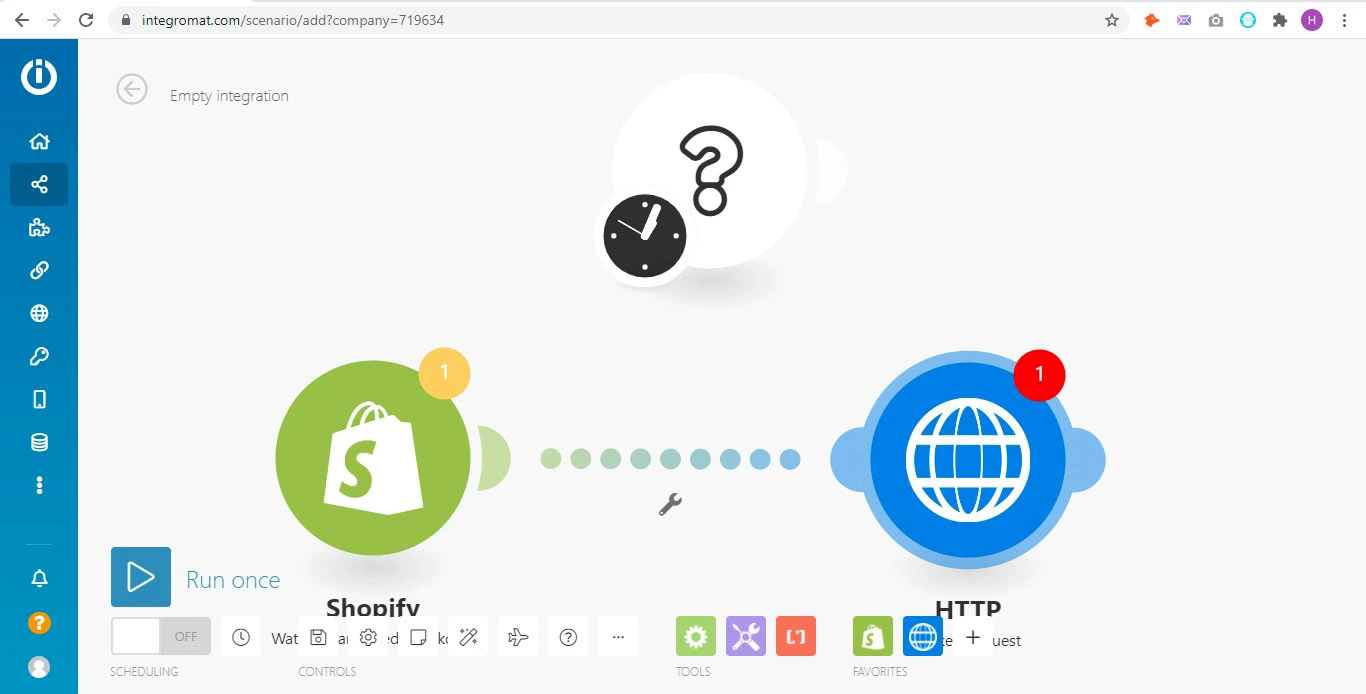
We check that Shopify and HTTP are connected with one line.
Next, and before configuring the HTTP connection, we will add the PHONE NUMBER application: This application allows us to adapt the phone numbers of your customers in Shopify to a correct format so that you can send messages to them. The application adds the international prefix, removes spaces between numbers, etc.
This process is necessary to be able to carry out the shipment correctly. If it is not installed, we may encounter problems when sending an SMS to a number that does not have the correct format.
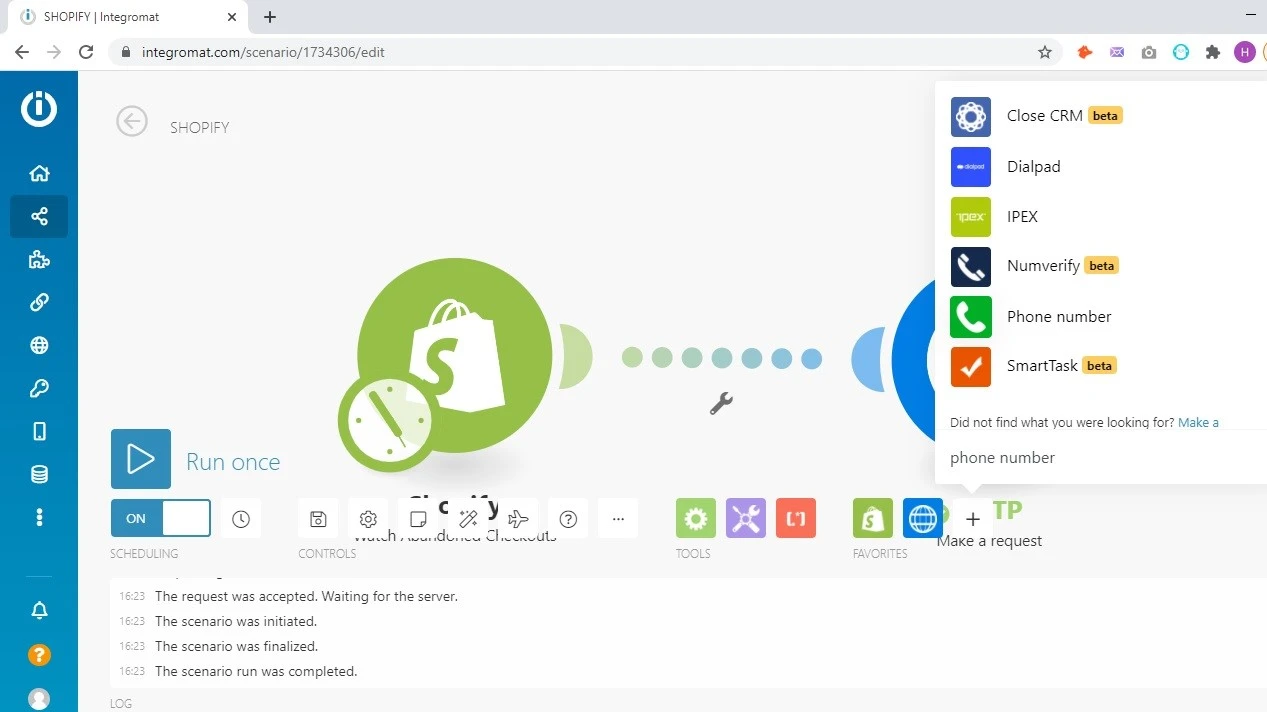
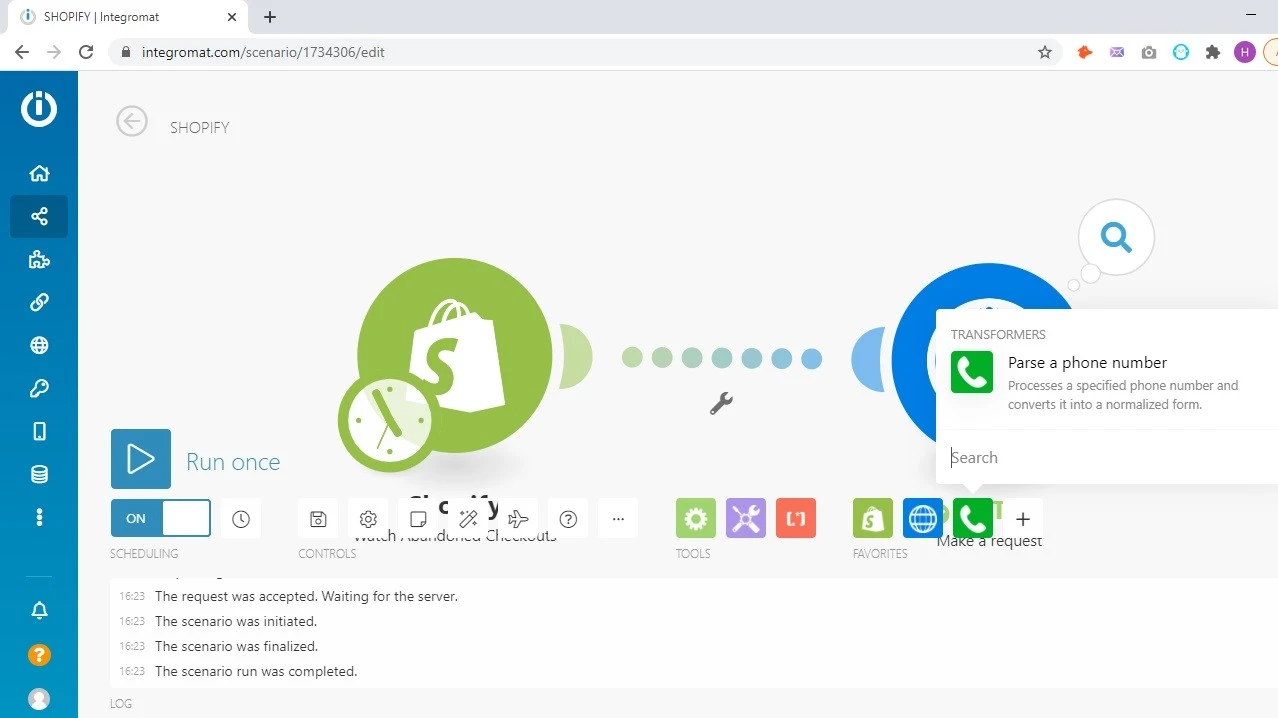
Check that the 3 apps are connected to each other with a dotted line.
We must indicate in the phone number field the Shopify Tag: SHIPPING ADDRESS: PHONE.
We indicate Shipping Address phone and not Phone since the first refers to the number that the customer was indicating to make that purchase.
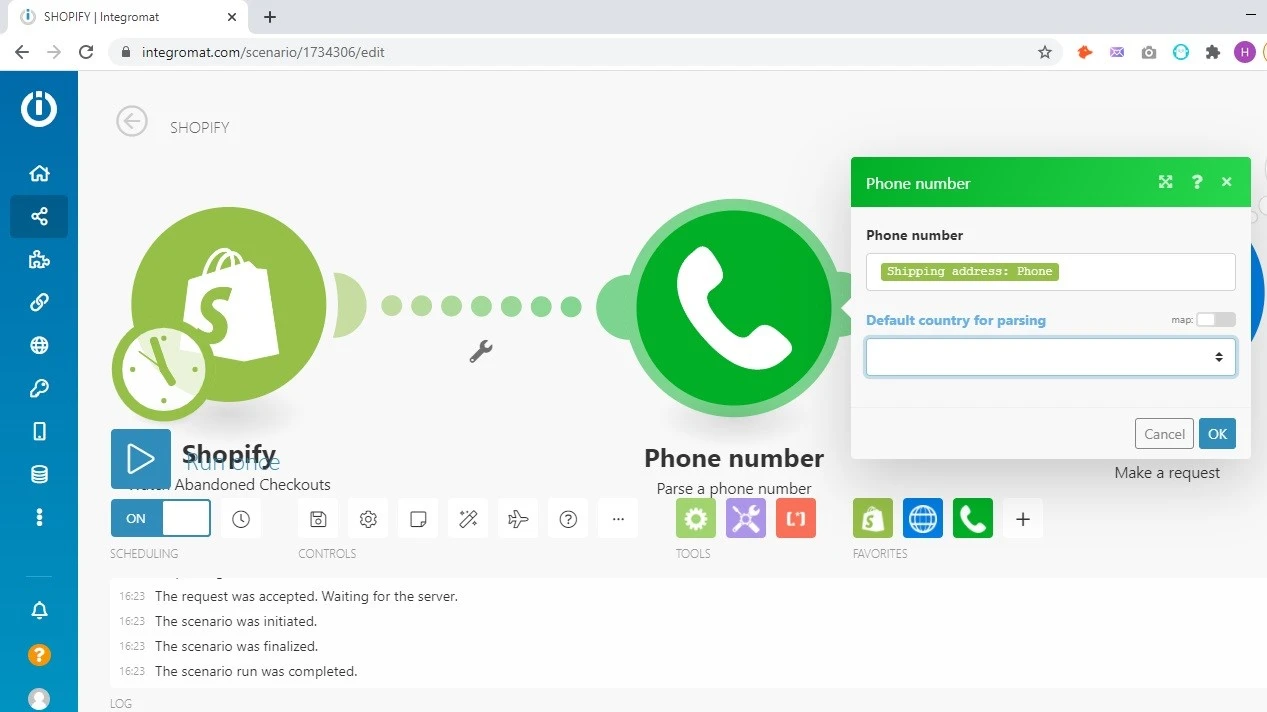
In "Default country for parsing" we must activate the MAP button.
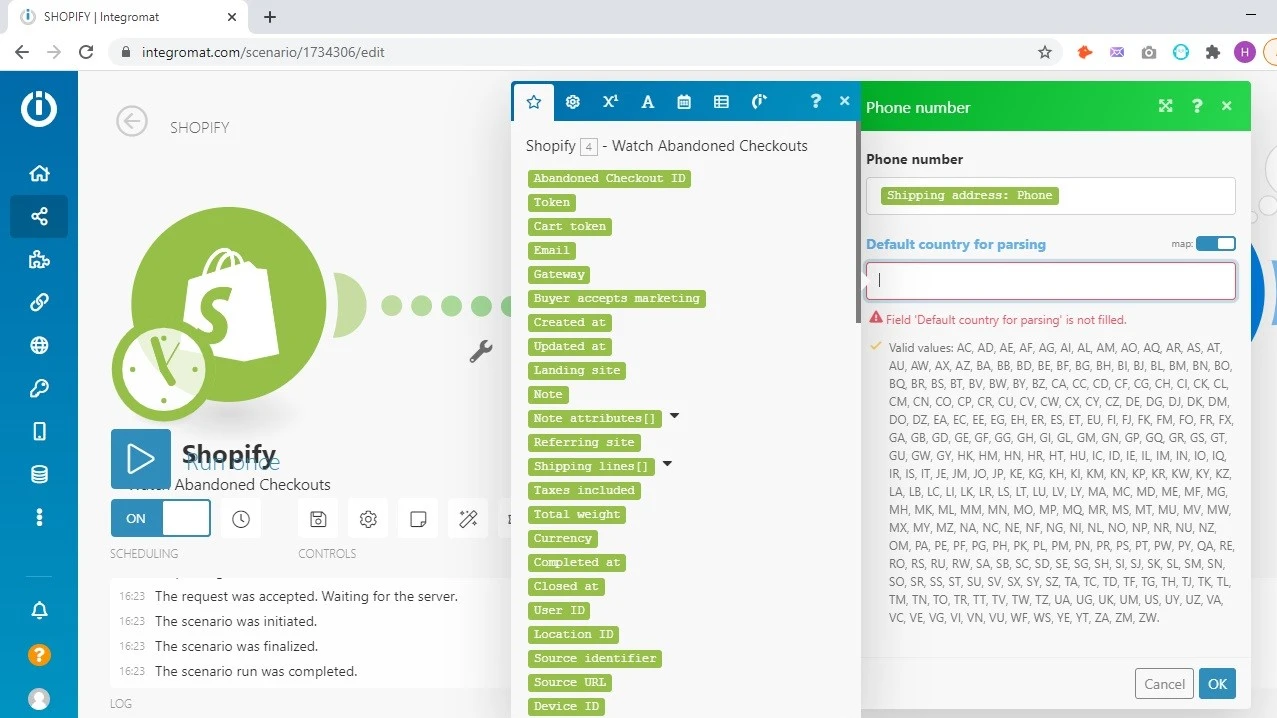
Activate MAP button
We will also indicate Country code, so the program will add the international telephone prefixes.

We click on OK.
Now, we click on HTTP to configure the connection.

URL to insert:
https://api.instasent.com/sms/?access_token=TOKEN
What is your token? You must obtain it from the Instasent panel.
Home - Api tokens - Create API token (shortcut)
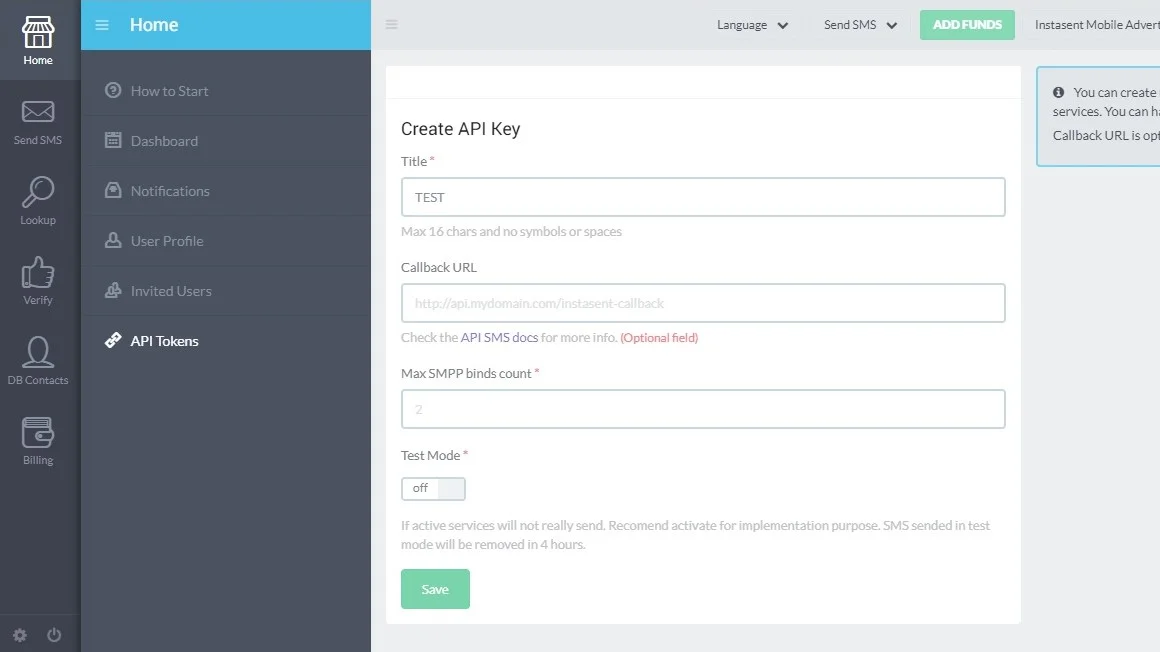
Give the token the title you want, keep test mode OFF and click Save.
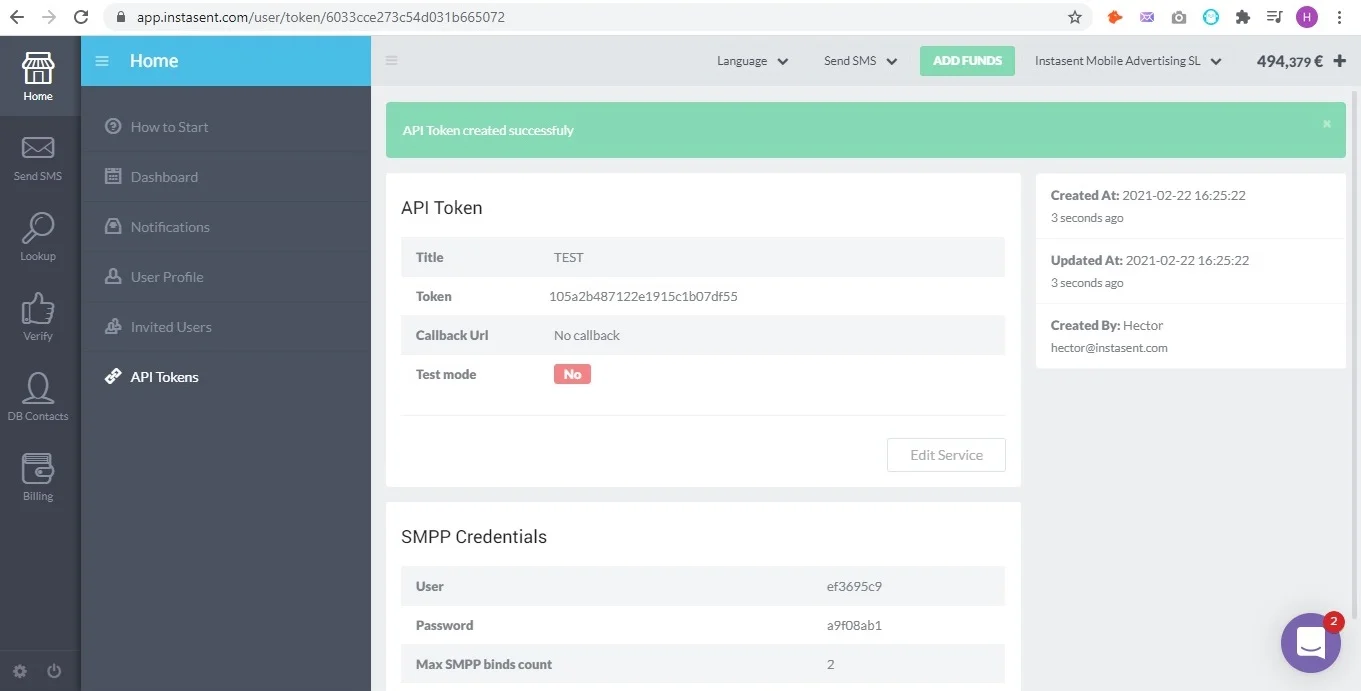
Copy what appears in the Token section, in this case 105a2b487122e1915c1b07df55.
So we already have the URL section complete:
https://api.instasent.com/sms/?access_token=105a2b487122e1915c1b07df55
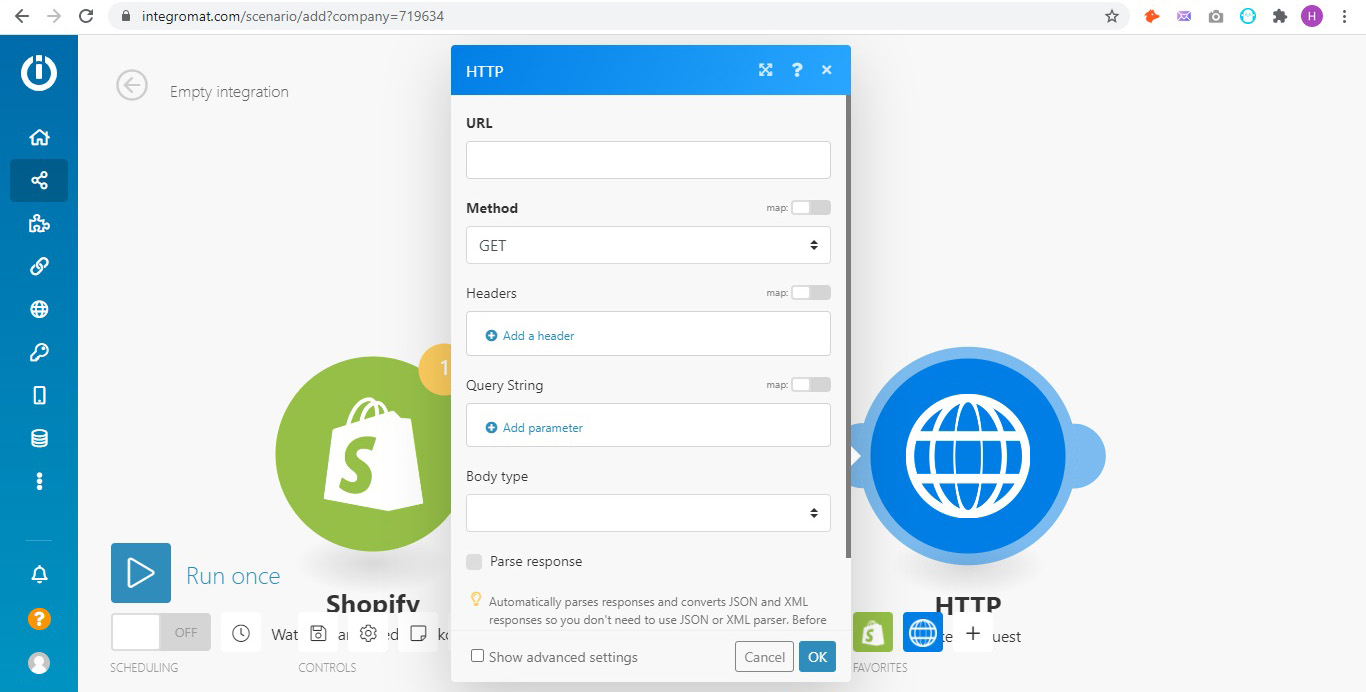
In Method, we select POST.
We do not add Header or Query String.

Sending an SMS is as simple as following the steps below:
Body type: raw
Content type: text / plain
Request content: we must complete with these parameters:
You must edit the sender 'BRAND', the receiver number and the text. You can customize these parameters with Shopify tags.
In "To" (recipient) you must indicate NUMBER IN E.164 FORMAT.
This would be the result:
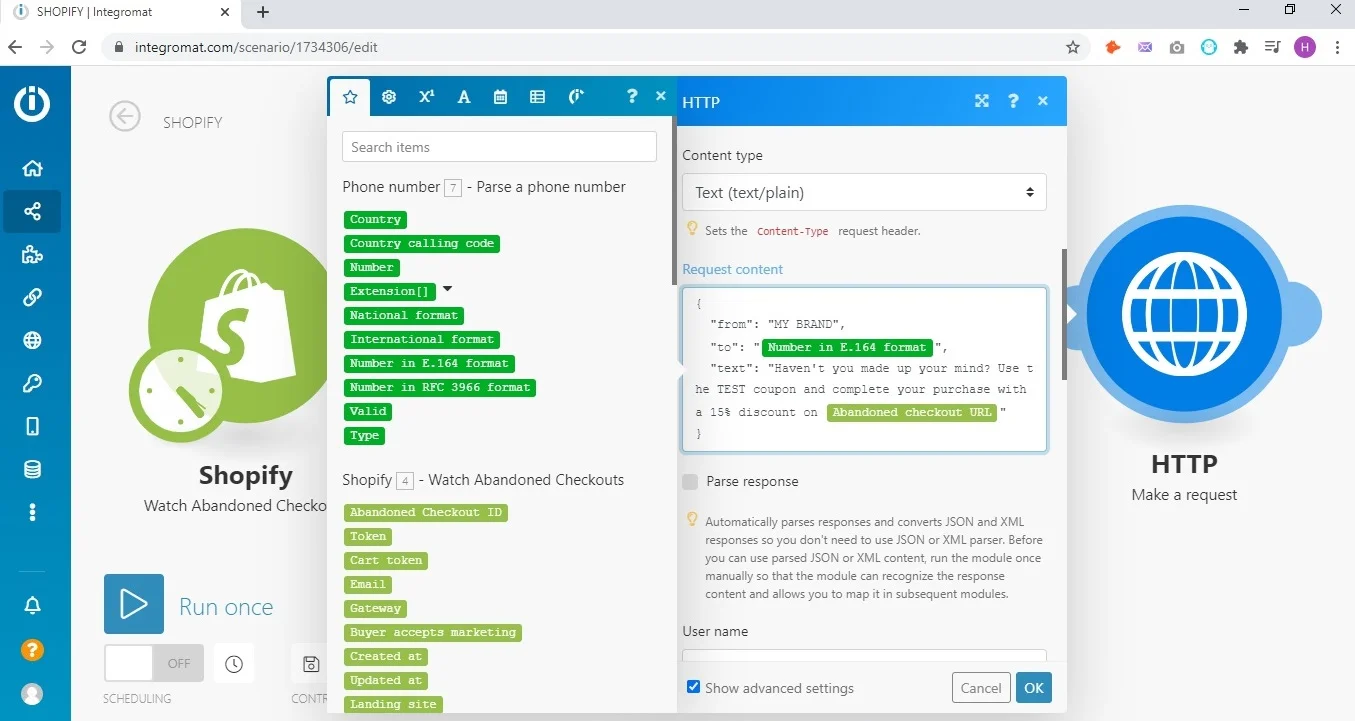
What {{4.abandoned_checkout_url}} allows us to do in this case is to obtain the link where the customer will retrieve their selected items in a single click, without having to start their purchase from scratch.
We can customize these parameters based on the information and message that we need.
We indicate OK in the blue button without touching the parameters that appear below.
We would see this:
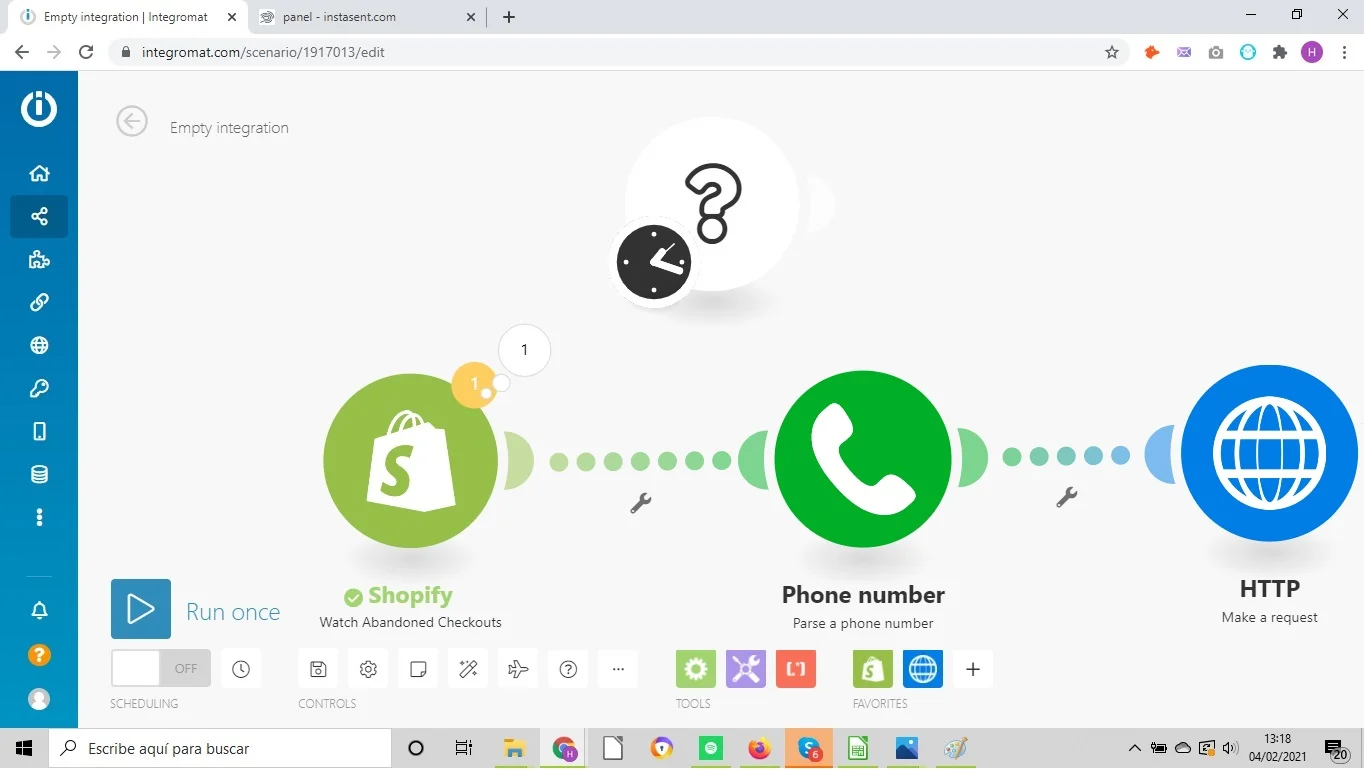
How to send SMS from Shopify using Integromat and Instasent
We can perform many actions from Shopify, depending on what our objective is. In this case we have decided to send a message to customers who have left items in the shopping cart. We can program how much time has to pass from when they leave our page until they receive the SMS.
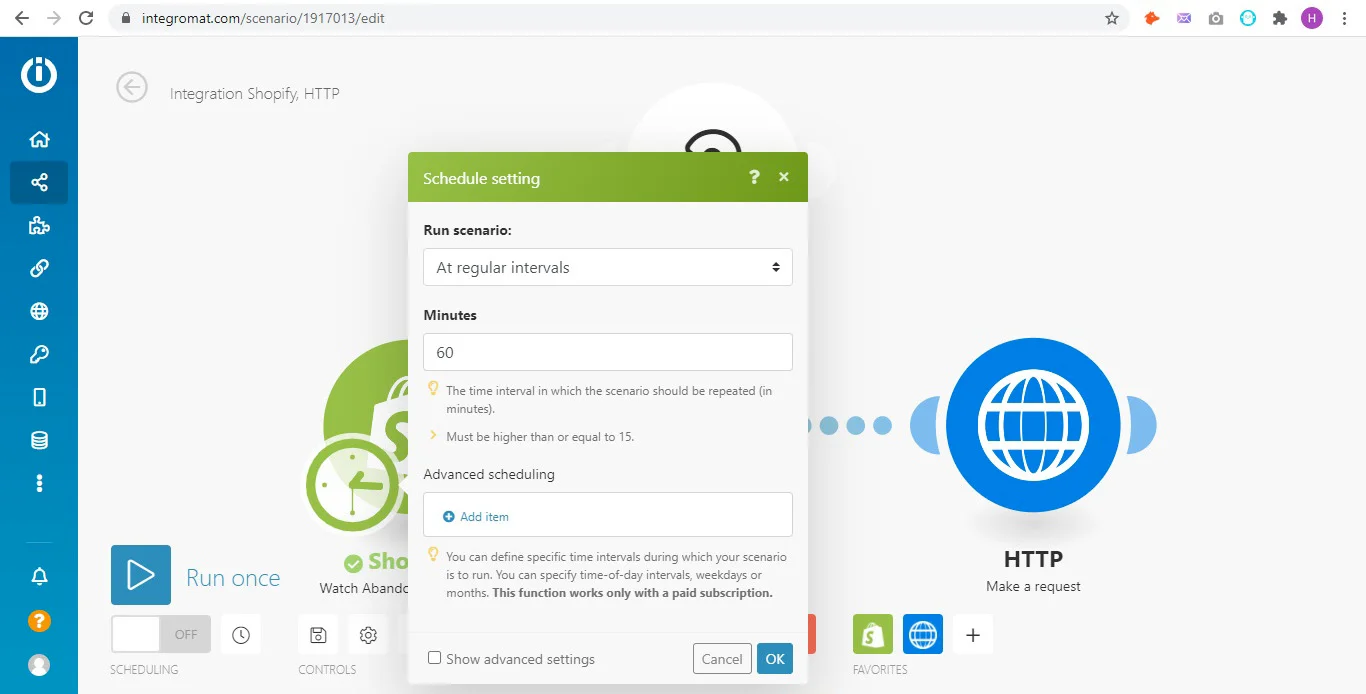
We drag the black clock to the Shopify icon.
We click on it and choose how often to check for new abandoned carts. We choose, for example, 1 hour. The shorter the interval, the more verification actions Integromat performs. Keep that in mind as the free version of Integromat has an action limit.
We click on Run Once to see if the scenario is correct.
If we see that everything is correct, we activate the stage in the ON button that is in the lower left corner and we already can see the active scenario from the scenarios section.
Pricing
